Table of Contents
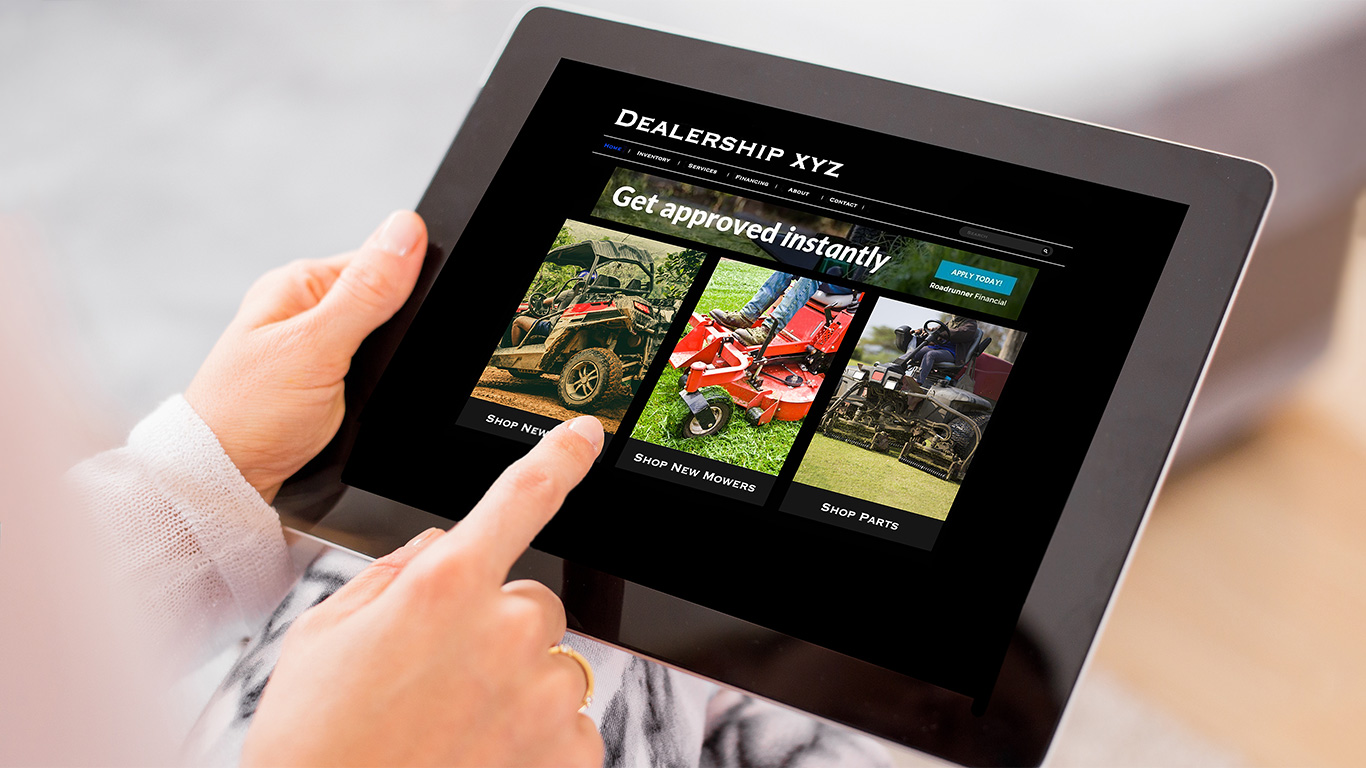
Now that you’ve downloaded Roadrunner Financial banner ads, you can use them across multiple digital platforms. If you haven’t requested banner ads yet, fill out our form!
The best way to use these ads is with your dealership-specific Roadrunner credit application link. That way, you can make the ad a clickable “button” that leads customers to a credit application. Any application that’s filled out with your link goes to your Octane account and no one else’s – that lead is yours!
*If you’re signed up with Roadrunner Financial, then you can submit to Roadrunner for instant decisions, and soft pulls if you’re a powersports dealer with the feature enabled. Click here if you’re interested in signing up for soft pulls.
Find Your Link
If you’re set up with Octane, you have access to a personal link that leads to an online credit application. This application is for your dealership only so your customers can apply for financing at your business before even walking into the store. To learn how to find this link, check out our guide on the feature and then you’re ready to start using it with ads.
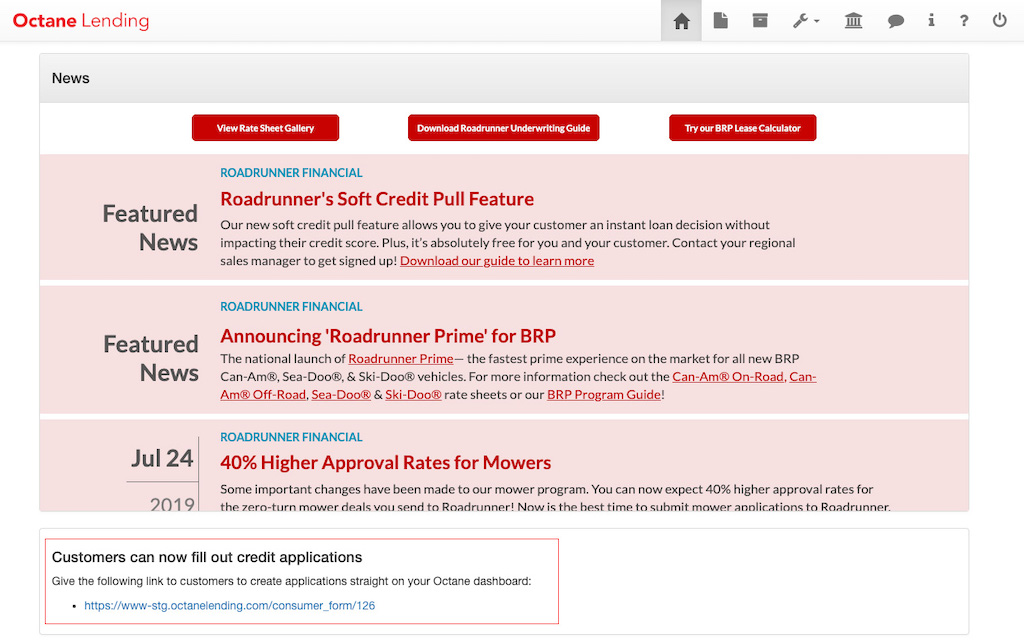
*Note: The links used in these examples are for instructional purposes only. Use your personal link for your banner ads.
How to Use Banner Ads in Emails
In follow up emails, the banner ad is a call to action for a lead who needs an extra push.
Gmail is the most common email service in the country, so we’ll show you how to use your banner ads in there. But this process of adding an image and link is similar in other email clients.
Gmail
Here’s how to add banner ads in Gmail, as well as how to add a link to that image.
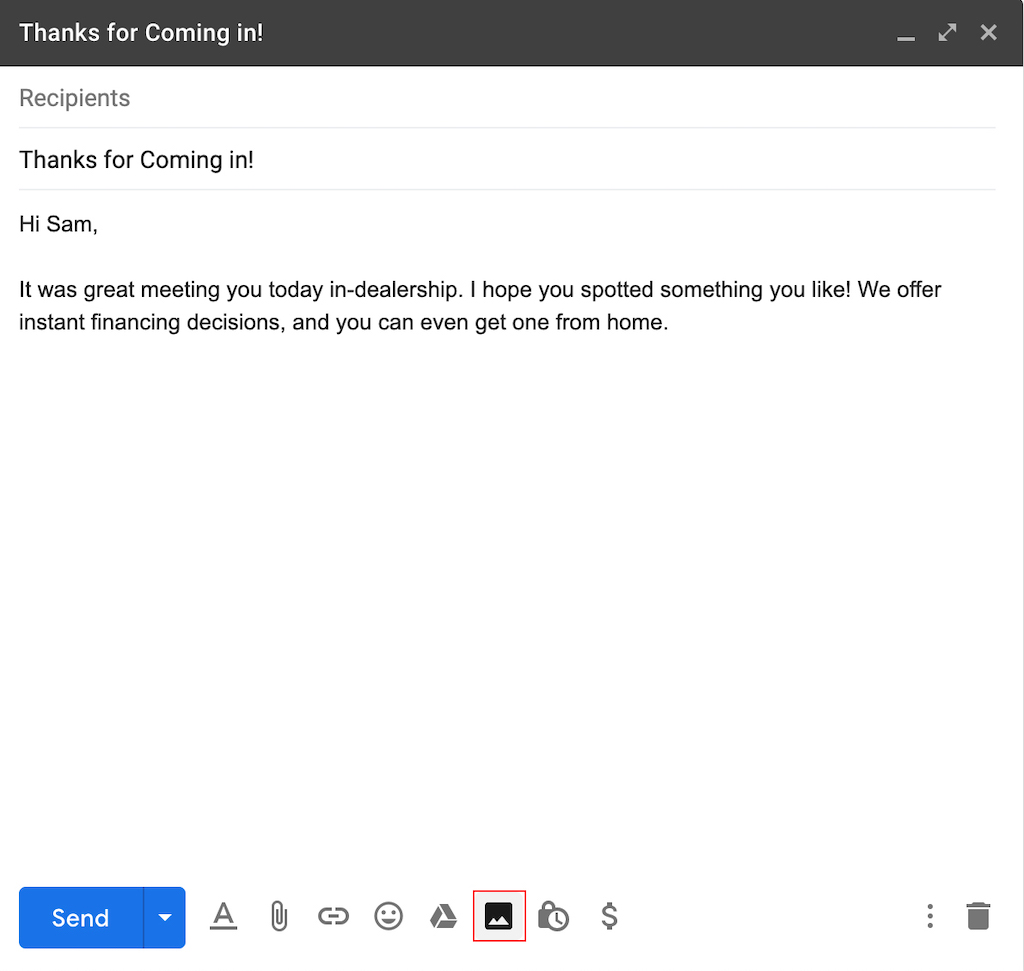
1. Draft The Email
Then insert the banner ad by clicking the image button in the toolbar (outlined in red).
2. Choose Your Banner Ad
Go into the Upload tab, and click the blue button to choose the downloaded banner ad from your files.

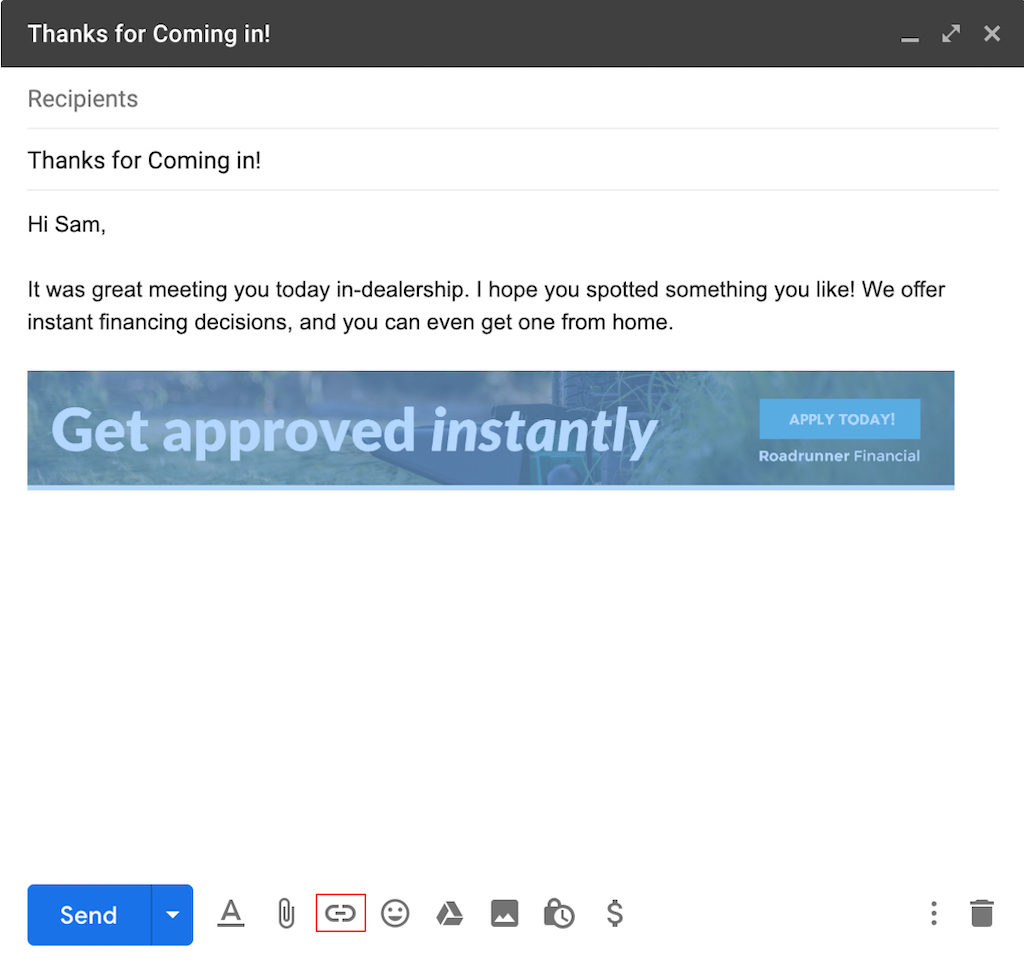
3. Highlight the Image
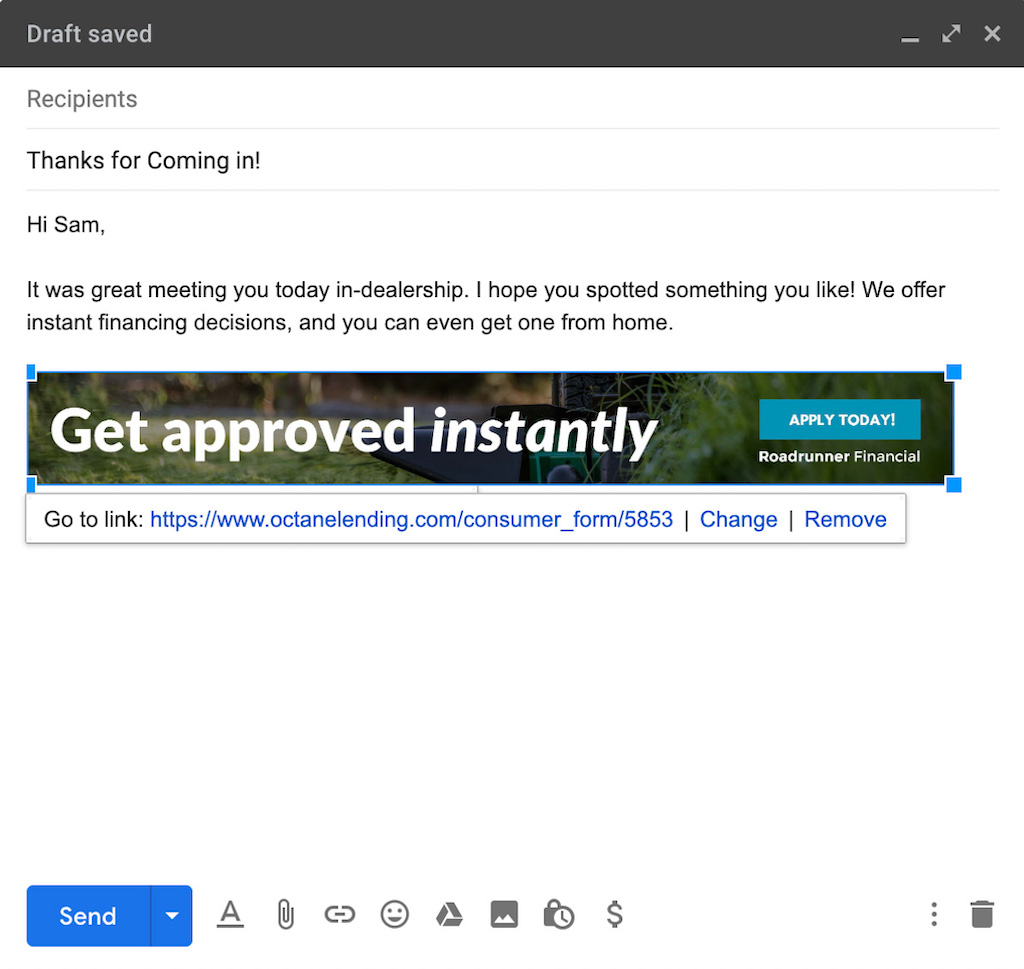
After you select it, your image will insert into the email. Highlight the image by placing your cursor to the right of the image, clicking, and dragging to the left until the image is blue. Once highlighted, click the link button in the toolbar (outlined in red).
4. Add Link
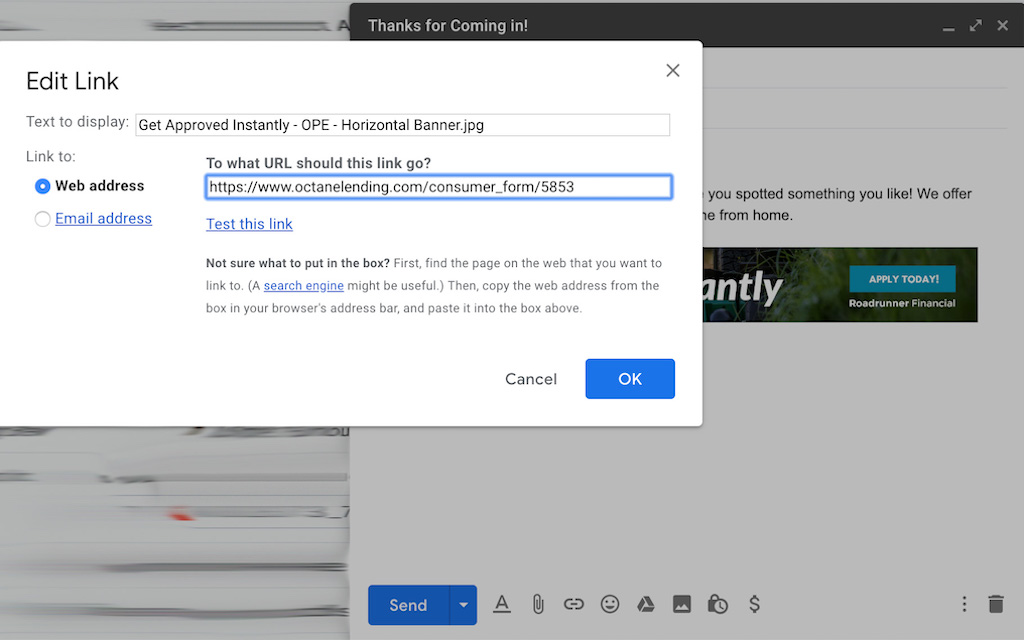
The “Edit Link” dialog box will pop up. You can change the “Text to display” if you want to give your image another name in the email. Now, make sure the “Web address” bullet is selected, paste your personal financing link into the URL area, and click OK.
5. Ready!
Your banner ad is now linked and the email is ready to send! When your lead clicks this image, they’ll be redirected to a credit application for your dealership.
How to Use Banner Ads on Your Website
In your website, banner ads are a great way to get browsing visitors on the road to a deal. There are a lot of tools out there for dealership website management.
Website + Inventory Manager (DX1 or Dealer Spike)
Most likely, your business uses a service that acts as a website and inventory management tool such as DX1 or Dealer Spike.
In order to add the banner to your website within these tools, you’ll need to log in to your admin account for the site. Once logged in you can make back end changes like adding the banner image and your personal financing link within the image.
If you don’t use one of these services, you probably use something like WordPress to set up your website.
WordPress Editor
WordPress is the most widely used content management tool, so we’ll show you how to incorporate the banner ad in that interface. Don’t be surprised if the process in your content + inventory management tool is similar to the one in WordPress.
1. Place the Banner Ad
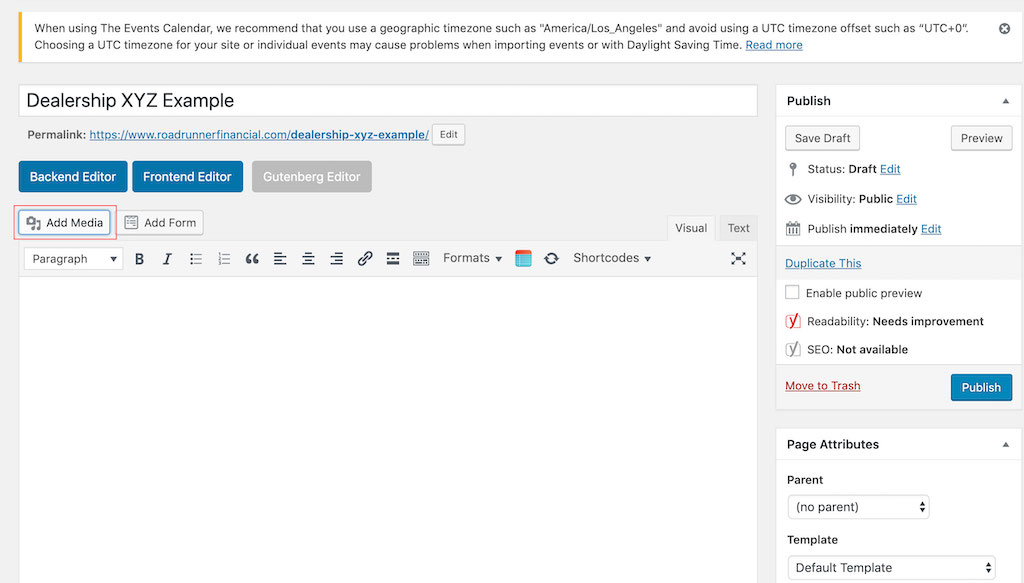
We’re starting with a basic, empty wordpress page for this example – yours will have some content already. Just put your cursor where you would like the image to go and click “Add Media”.
2. Select the Image
Go to the “Upload Files” tab and click “Select Files”. This will open a window where you can now select your downloaded banner ad from your files. Double click the file you want to use, and click “Insert into page” at the bottom right of the Add Media dialog window.

3. Edit Image
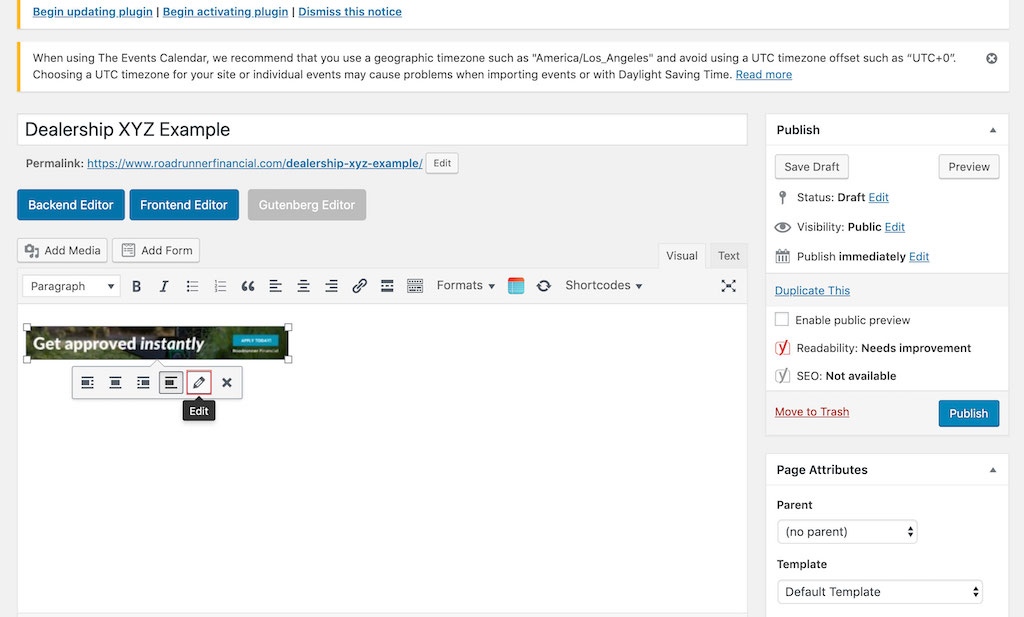
The image is now in your page field, but it may not look quite right. Select the image and click the “Edit” button that looks like a pencil.
4. Adjust Size and Placement
In this Image Details window, you can select the image alignment and size. We picked full size and no alignment, but you can play around with the presets or your own custom size to make the image look just the way you want it.

5. Add Custom URL
Now, click the “Link To” dropdown and select “Custom URL”.

6. Paste Your Link
Paste your dealership financing link into the Custom URL Field. Click “Update” and your banner ad in the WordPress page editor is now a linked image – just publish the page and your changes will be live!

HTML Code
If you use HTML to create or edit your website, the image code will look something like this:
<img src="Get Approved Instantly - Horizontal Banner.jpg" width="3322" height="411" alt="Financing Banner Ad">
You can add a link to that image by adding hyperlink tags. It’ll look like this:
<a href="YOUR PERSONAL FINANCING LINK"><img src="Get Approved Instantly - Horizontal Banner.jpg" width="3322" height="411" alt="Financing Banner Ad"></a>
*Note: Simply copying and pasting this code will not work. If you’re not familiar with adding images with HTML, please reference an HTML guide to successfully add the banner ad to your website. You can then use this tag framework to add your dealership link to the image.
How to Use Banner Ads on Facebook
On Facebook, there are a few ways you can use your link to create a social media ad.
Link With Image Thumbnail (No Cost)
This method is an option if you want your post to look very “clickable” but with a small image.
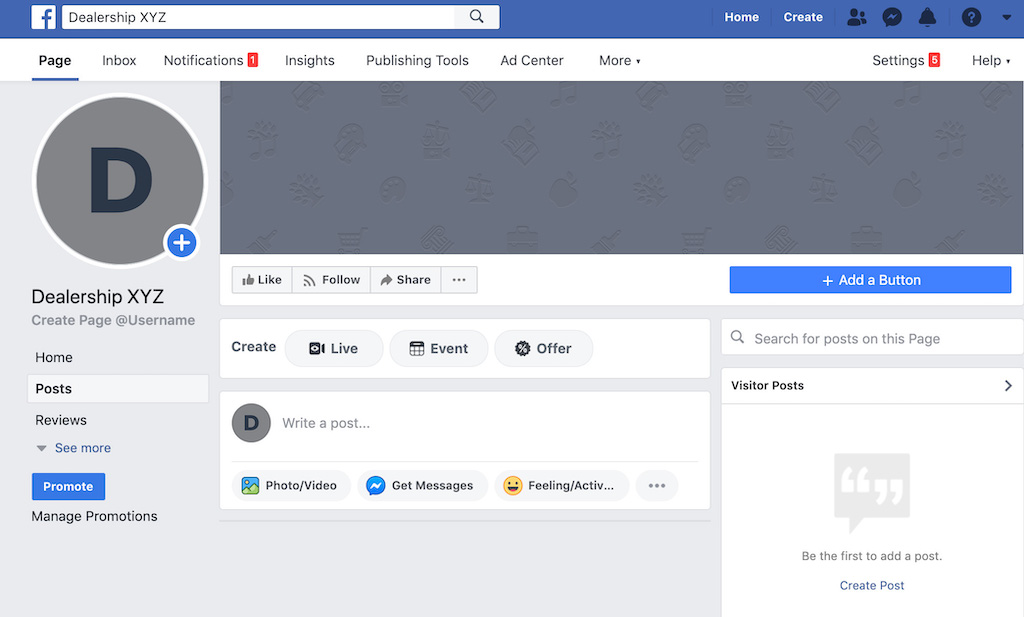
1. Start the Post
Go to your Facebook business page and click into the “Write a post” area.
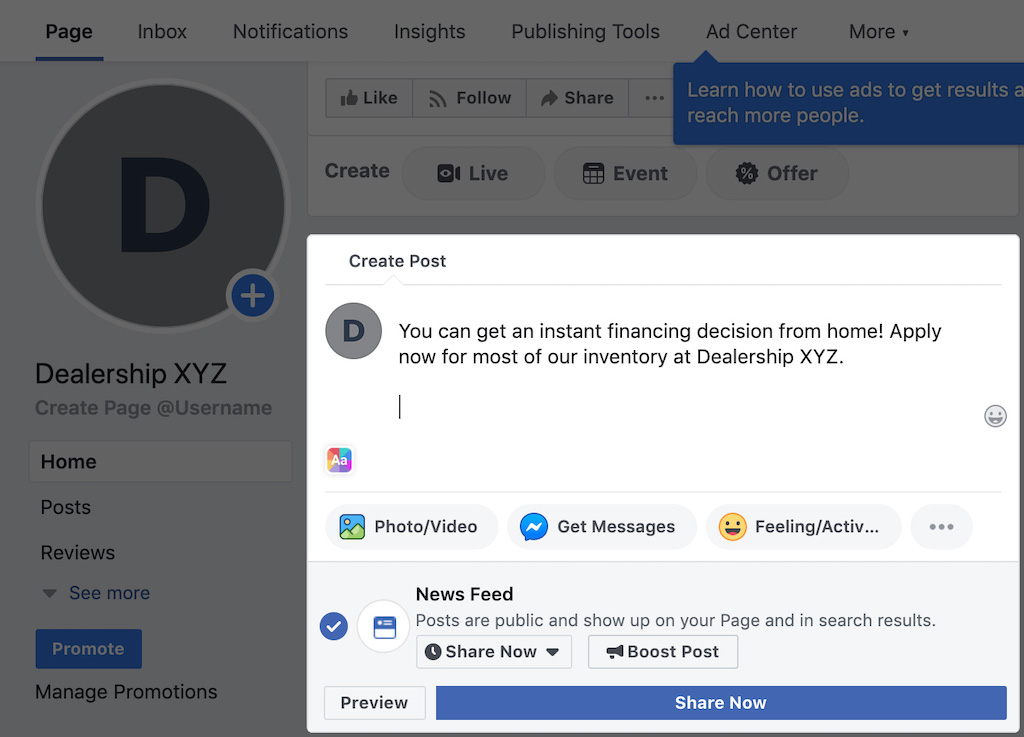
2. Draft the Body
Write the post body with your message, and hit Enter two times to go to the next line.
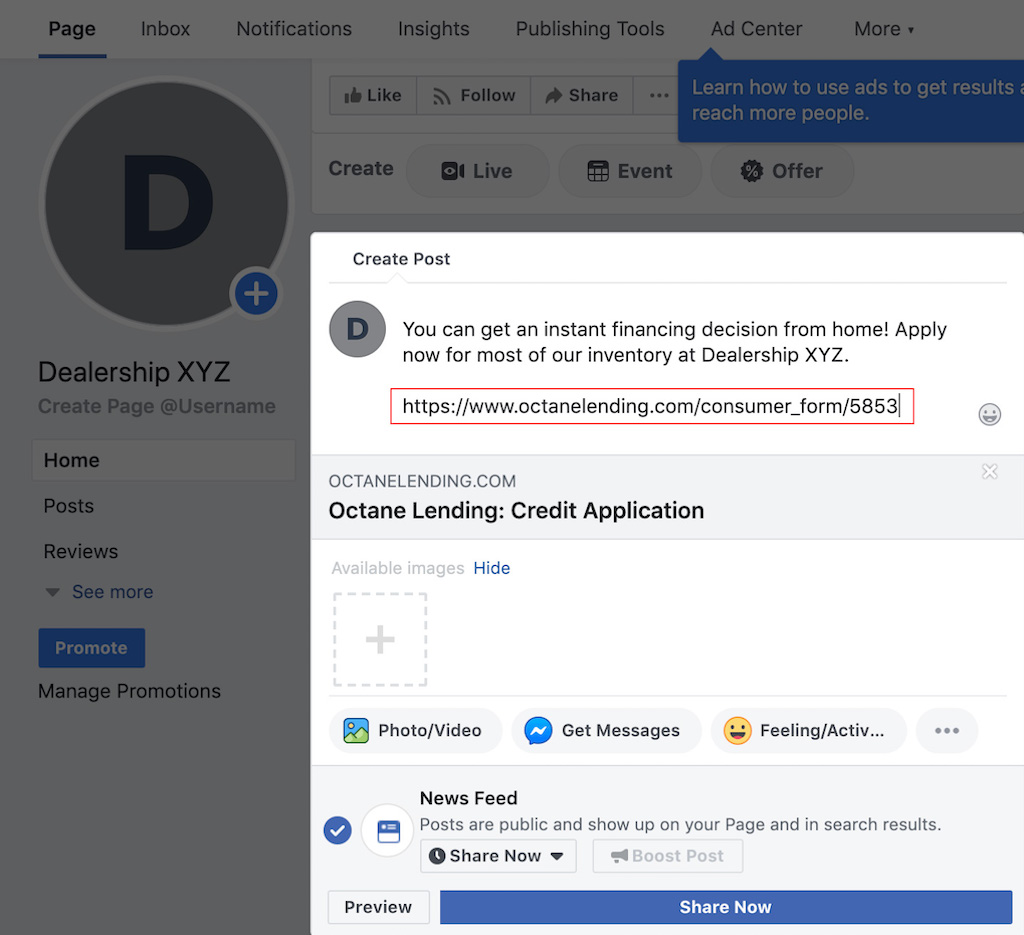
3. Add Your Link
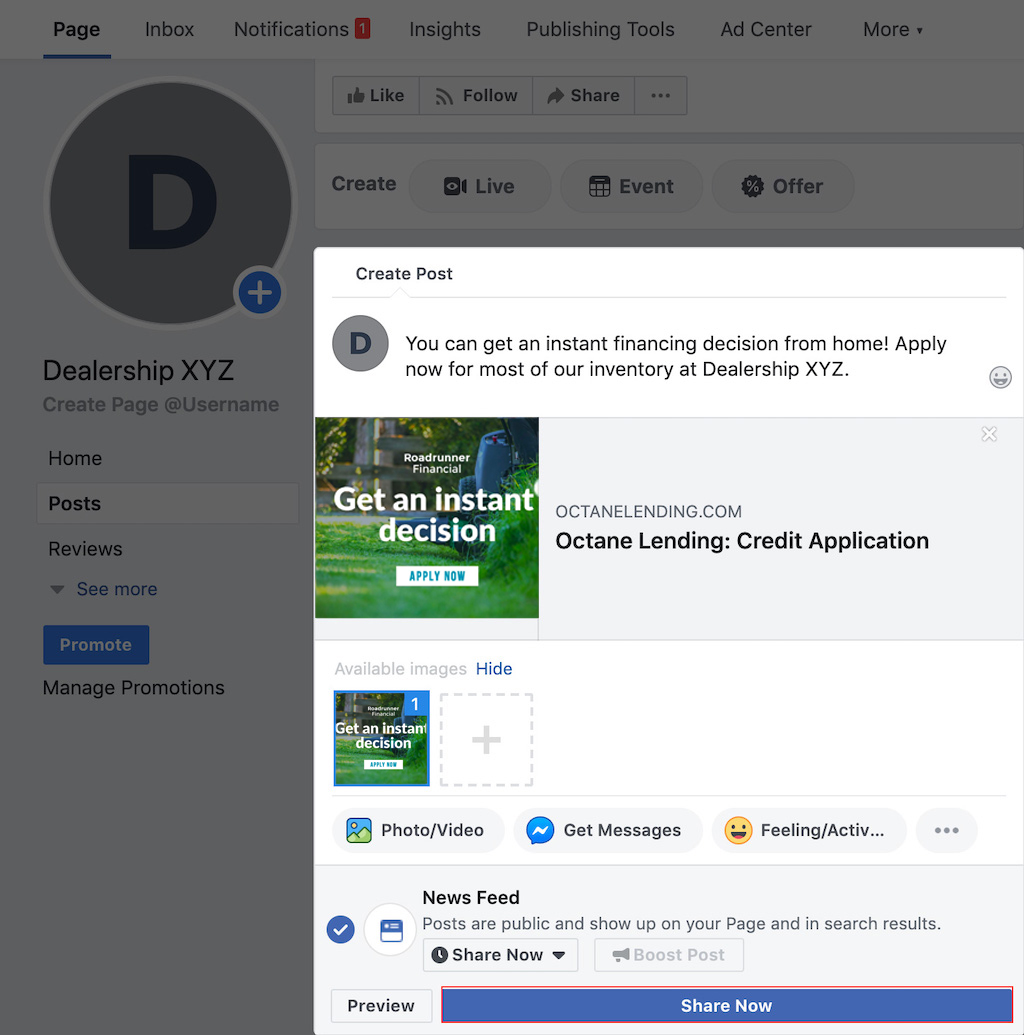
Paste your dealership financing link (outlined in red). You’ll see a gray link preview pop up, that says “Octane Lending: Credit Application”.
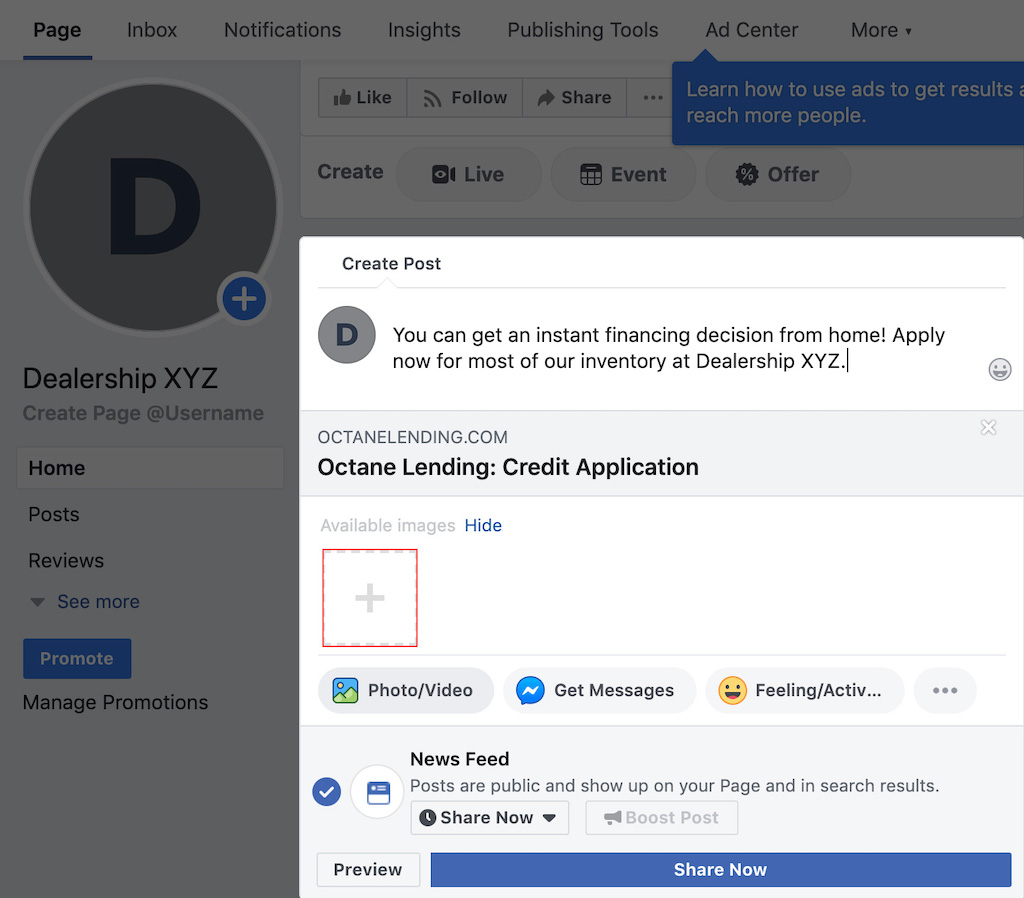
4. Select the Banner Ad
Delete the Octane URL – the gray link preview will stay there! Now, click the dotted box with the “+” in the middle, under “Available images”. This will pull up your personal files to choose from- select the banner ad from your downloads.
5. Share!
Now that you’ve selected the banner from your files, the preview will pop up in the link area. It may look a little weird but don’t worry, it’ll look better after you post. Click “Share Now” when your message is ready to go.
6. The Finished Product
This is what your post will look like – your followers can click right on the link preview and it will take them to the credit application!
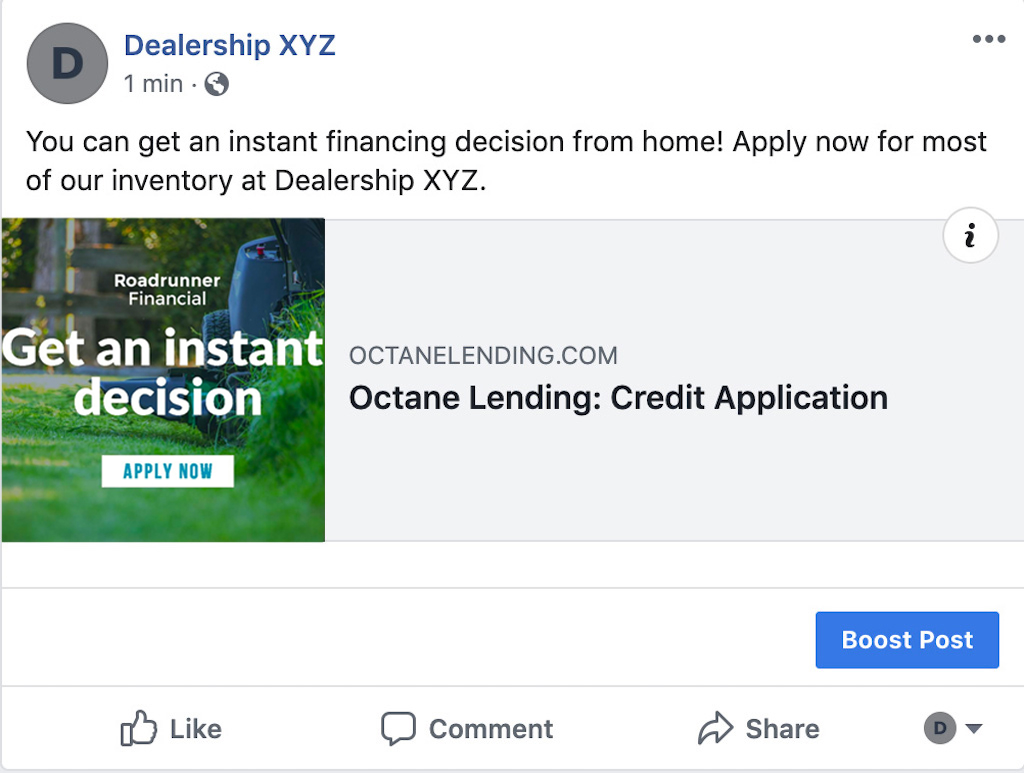
Image With Pasted Link (No Cost)
This option is good if you don’t mind the link itself being in your post, plus the banner ad can be full size.
1. Select Your Banner Ad
From your business page, click “Photo/Video” in the post options and select the banner ad from your files.

2. Paste Your Link in The Post
Write your message, hit Enter to create a line break or write something like “Apply now:”, and paste your dealership financing link there. Hit “Share Now” and your post will look something like this:

Sponsored Ad (Paid)
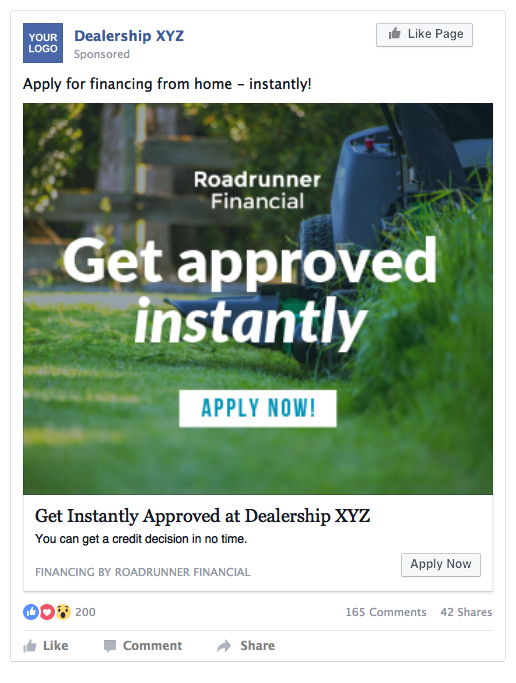
The free methods above are great options to drive your followers toward a sale. Paid ads, on the other hand, can be seen by Facebook users who don’t already follow you.
Paid ads also incorporate a link button and large image. If you want a bit more functionality and reach outside your current followers, the paid ads on Facebook look something like this:
Use the sharing buttons below to send these instructions to your web administrator, or whoever is in charge of your advertising
The above article is being provided for informational purposes only and shall not be considered any type of professional advice. Roadrunner Financial, Inc. (RF) does not warrant the accuracy of the information contained herein. Prior to utilizing RF as a lender, all dealerships are subject to underwriting approval by RF, in its sole discretion. No loans will be funded without a signed Dealer Agreement between the dealership and RF. All applicants for credit through RF are subject to credit approval. Other qualifications and restrictions may apply.
